Kotlin & Android: A Brass Tacks Experiment, Part 1.
Doug Stevenson Disclaimer: I am a Google employee, but the views expressed in this article are not those of my employer.
Kotlin & Android: A Brass Tacks Experiment, Part 1
One topic that’s been gaining popularity over the past year in the world of Android development is the Kotlin® language for the JVM from JetBrains. JetBrains is the same crew who created IntelliJ Idea, which is the foundation for Android Studio. Kotlin takes aim at the age and perceived uncoolness of the Java® language with fresh and popular language features. I imagine that the crew at JetBrains imagines it could potentially become a replacement for Java® programming for all kinds of development on the JVM. Because it’s 100% inter-operable with the Java language, you can choose to use as much or as little Kotlin in your project as you like. And because it has a relatively small standard library, it’s suitable for development on mobile devices with limited resources.
Kotlin can do anything the Java language can do and more, but often with a more concise and pleasant syntax. There is full IDE support in IntelliJ and Android Studio. Because I’ve been deeply involved with Android since 2009, my specific interest in Kotlin is to discover what it uniquely offers to Android developers. So I’m cutting through the hype in this blog series and getting down and dirty with Kotlin’s best language features, to see if I can make something truly useful.
In this first of a series of blog posts, I’ll go over the cleanest possible path to get Kotlin integrated into a new Android project. But if you’re looking to get straight to the code already, then go ahead and jump to part 2!
Configuring an Android Project with Kotlin
The official docs on getting started with Kotlin will show you how to install the Kotlin IDE plugin, and use that to modify an Android project’s Gradle config to add support for compiling Kotlin source. I don’t recommend this particular process, because I found the result of the automation to be less than satisfactory. While the changes it makes to the project’s Gradle build files might technically work, they don’t seem to be consistent with the way that new Android projects are typically set up.
To be frank, I have never been a fan of any Android Studio plugin that tries to guess changes to make to Android builds — more often than not, they botch things up, and I have to redo everything it did to clean it up to my liking. Gradle build files are actually source code, and automated processes are not really good at making changes to existing code! So, if you’re picky like me, take the extra minute to configure your project manually.
If you want to follow along, we’ll take four quick steps to get up and running:
- Create a new Android project.
- Modify the Gradle scripts to include the Kotlin Gradle plugin and standard library.
- Apply the Kotlin plugin for IntelliJ or Studio.
- Convert a Java class to Kotlin.
First, create a new Android project using a template that adds an activity. When you have that, there are just five important lines of code to add across two build.gradle files, which I will highlight below. Let’s modify the top level build.gradle buildscript stanza with a couple of new lines:
buildscript {
    ext.kotlin_version = '1.0.0'
    repositories {
        jcenter()
    }
    dependencies {
        classpath 'com.android.tools.build:gradle:1.5.0'
        classpath "org.jetbrains.kotlin:kotlin-gradle-plugin:$kotlin_version"
    }
}
This adds the Kotlin Gradle plugin into the build. Note the definition of the Kotlin version string defined in ext.kotlin_version. We’ll use it twice: once here in the buildscript classpath, and once in the app compile dependencies, and it must be the same in both places. You should of course use the latest version published via Maven. You can find the latest version documented here.
Next, apply the kotlin-android plugin after the Android plugin in the app’s own build.gradle after the standard Android plugin. This makes the project Kotlin-aware and adds a Kotlin compile step to the build, so that all the classes generated by both the Java and Kotlin languages get bundled together in the final app:
apply plugin: 'com.android.application'
apply plugin: 'kotlin-android'
By convention, Kotlin files want to live under src/main/kotlin, but they could also live alongside Java files in src/main/java. So, let’s be conventional and tell Gradle to recognize a new source directory for Kotlin source within the Android project definition:
android {
    sourceSets {
        main.java.srcDirs += 'src/main/kotlin'
    }
}
Don’t forget to create that directory because we’ll use it later. You’ll also need a compile dependency on Kotlin’s standard library, using the version variable from the buildscript:
dependencies {
    compile "org.jetbrains.kotlin:kotlin-stdlib:$kotlin_version"
}
But how big is this library we’re adding? This is a great question. Every Android developer should be asking this question every time a new compile dependency is added. However, we’ll save that discussion for a later post in the series.
At this point, you should be able to do a command line Gradle build as you would normally with gradlew, and you can also build and deploy an APK from Android Studio. Nothing should change except the size of the app, which grows with the Kotlin standard library.
So that’s the Kotlin Gradle plugin, and adding it to your project like this is sufficient to build and run Kotlin code in the project. But you’ll probably also want IDE support for Kotlin language features. If you haven’t already installed the Kotlin plugin for IntelliJ or Android Studio, now is a good time for that.
Installing the IDE plugin is just like any other. You can find that under Preferences → Plugins → Install JetBrains plugin. Be sure to restart the IDE after installation. With that, you’re done with setup. I’ve found that the IDE support for Kotlin is almost as good as for the Java language, but I would expect as much, since JetBrains makes both the IDE and Kotlin!
From Java to Kotlin the Easy Way
One interesting feature of the IDE plugin is its action for converting Java source to Kotlin source. The plugin is smart enough to replace Java idioms with Kotlin idioms while retaining full runtime compatibility. If you’ve created a new Android project to try this out, go find the main activity that was generated for you, select it in the project explorer on the left, and invoke the IDE action called “Convert Java File to Kotlin File”. You can do that by bringing up the action selector with Command-Shift-A (on OSX), then typing that action name. The plugin also provides a finger-bending keyboard shortcut for this action (on OSX it’s Option-Shift-Command-K). So, enjoy typing that! Note that the official documentation for this conversion currently does not suggest 100% correct behavior for this action, but I haven’t encountered a problem so far.
If you convert a Java file like this, you’ll end up with a Kotlin .kt file in place of the original .java file like this:

MainActivity converted from Java to Kotlin
Notice that MainActivity has a Kotlin K logo on it now (but the file extension .kt is hidden here). Since we configured and created a dedicated source folder for Kotlin, as you can also see above, why don’t we move the newly converted Kotlin file to the space for Kotlin? It’s just like refactoring a Java file by moving it into a new folder or package by dragging it in the project explorer. Be sure to retain the existing package name of the class in the kotlin source directory so that the project still runs.
If you only want to use Kotlin in a project, you are free to delete the java source dir completely and put all Kotlin files in the kotlin space. With that, your project will look something like this:
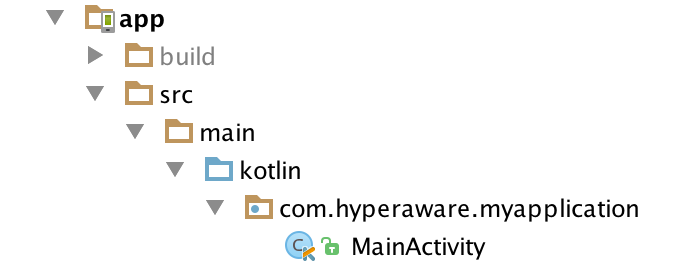
MainActivity moved from java source dir to kotlin source dir
I’m sure you’ve already started to dig around in the converted activity, so you’ve probably already got a taste for what Kotlin looks like. I’ll point out a couple things that look different from the Java language. You’ll never see the keyword “new” in Kotlin; constructors are invoked simply by treating the name of the class as a function and passing it arguments. Also, the types of variables are typically missing from a declaration with val (final) or var (variable), and Kotlin can usually figure out what the type is.
I’ll leave it up to you to make the initial leap from Java world to Kotlin world, and we’ll continue next time with the beginning of a small project to see what Kotlin can uniquely offer Android developers. If you follow me, @CodingDoug, here on Medium, or the same on Twitter, you’ll get notified as soon as new parts are available in this series!